Thursday, December 27, 2012

Turkey brining

Turkey.
I love turkey and all the yummy meals that can be made from this little fowl, but sometimes cooking a turkey can be overwhelming and you are certain you are going to mess it up. We haven't messed up a turkey after brining it (okay well there was the one time, but it was the first time and we missed a big step). But it IS super easy to do.
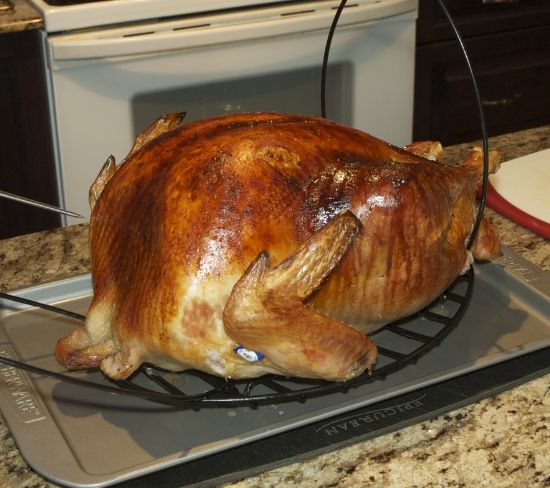
 photo 1e8c45b0-50aa-4f58-8ff2-8c6694448419.jpg

What you need:
a big bucket, like a utility bucket from home depot OR a good sized clean, empty cooler
an unfrozen (fresh or thawed) turkey that will actually fit in above container
kosher salt
brown sugar


What to do:
In your bucket mix together the brine and stir well.
Immerse the turkey (be sure to remove the innards/neck/etc from the inside of the bird) into the brine. Make sure it's under the water and covered. We usually just allow the cavity to fill with brine, but you might need to weight it down with something.
You can either put a lid on or just tin foil to cover and leave in a cool place. Where we live is a cold place when it is turkey time, so we usually will just put the whole container outside in the garage or on the back deck depending on how cold it is.
Turn the the turkey over in about 12 hours.
Leave for an additional 12 hours (for a total of 24, more if you want)

Now this is the part that we omitted the first time we brined a turkey: Rinse off the turkey well. Clean off the outside and rinse out the inside of the bird. If you don't then the first couple of cm's of the cooked meat will be salty.

Pat the bird dry and cook as desired. (deep fry, roasted, BBQ?)
Saturday, November 17, 2012

Black bean soup

Every November brings "the hunt". T grew up in Northern Ontario with lots of uncles and cousins and they all get together on the family property on Manitoulin Island for a week during deer season.
All these men bring a meal (and desserts) to share and T is no exception.
This years contribution was spicy black bean soup. It was tasty and there was a lot of it!
I made a double batch and it made for two meals, which was perfect for them from what I am told.

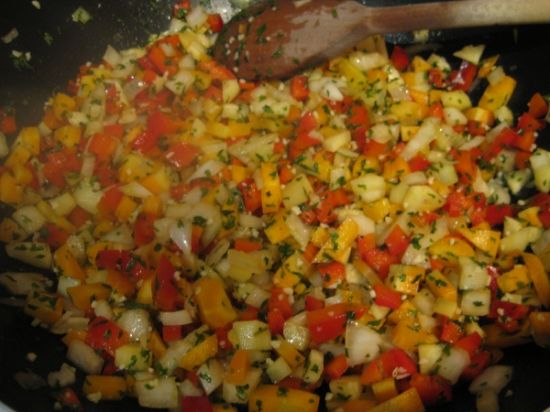
I only remembered to take a picture of the mirepoix mixture, not of the soup itself. Silly me. But this smelled so, so good!

 photo 481e40f6-c808-4897-b992-06ceeccdace7.jpg


Ingredients:


  • For the beans:
  • 1 lb dry black beans
  • 1  bell red pepper
  • 1 onion roughly chopped
  • 3 bay leaves
  • 4 cloves of garlic, smashed

  • For the soup:
  • 1 tbsp olive oil
  • 1/2 cup chopped parsley
  • 1 red pepper minced
  • 1 large onion, minced
  • 2 medium carrots, shredded
  • 6 cloves garlic, minced
  • 1 tbsp red wine vinegar
  • 1/4 cup white wine (optional)
  • 1 1/2 tsp cumin
  • 1 1/2 tsp oregano
  • 1 1/2 chicken or vegetable bullion cubes
  • salt to taste
  • black pepper to taste
Directions:


  1. Rinse the beans and place in a large pot with about 8-10 cups of water. 
  2. Cover and bring to a boil, then remove from heat and let the beans sit, covered for one hour. (Or you can let them soak overnight in cold water)
  3. Drain the water, then add 8-10 cups of cold water when ready to cook. Add the bell pepper, 4 garlic cloves, onion and bay leaves to the beans. Bring to a boil and reduce heat to low. Simmer for about an hour or until tender, stirring occasionally. You might need to add a little more water, depending on the beans.
  4. In a large, deep frying pan, add the olive oil and heat. Add in the chopped vegetables (onion, parsley, carrots, pepper, garlic).  Sauté for about 5 minutes or until soft.
  5. Add the vegetables into the beans then add vinegar, wine, cumin, oregano, bullion, salt and pepper.
  6. Cover and allow to simmer on low for about 20-25 minutes. 
  7. Remove bay leaves, and use an immersion blender on pulse to partially blend the soup for about 10 seconds to allow to thickening. If you don't have an immersion blender you can put about 3 or 4 cups of the soup into a blender, pulse until some of the beans are broken down and then add this slurry back into the soup. Try to get  beans/veggies into the blender, not all  liquid, but also make sure to leave some beans intact for the soup!
  8. Add salt and pepper to taste.
  9. Serve and top with a little sour cream/greek yogurt, chopped green onions, chives or cilantro.

Monday, October 8, 2012

French Macarons

Years (and provinces) ago I found a recipe and tried it. It was an abysmal failure, epic some would say. Years later I moved and found the recipe and tried again....

I made them.
And then made them again.
Then I tinkered and made them a few more times.
By now T is getting more than a little irritated by my obsession to figure this recipe out.
Almond flour is expensive!

Now I think I've figured the recipe out and the process because honestly the process is almost as important as the actual ingredients.


Ingredients:


  • 1 cup icing sugar
  • 3/4 cup almond flour
  • 2 large egg whites (aged, so crack separate them and leave them in the fridge for a few days or on the counter for a few hours, but in the fridge for a few days works better)
  • Just a little cream of tartar
  • 1/4 cup super fine (or berry) sugar

Directions:


  1. Pulse together icing sugar and almond flour and then sift twice (more if needed or you made your own almond flour). I didn't think it was really necessary once and only sifted once. Do it twice, just follow this recipe to the letter for the best chance at success. Set aside for the time being.
  2. In a separate bowl, whisk (or beat) egg whites on medium until foamy.
  3. Add cream of tartar to the eggs continue whisking until soft peaks form. You don't need a lot, just a touch.
  4. Add in the superfine sugar.
  5. Increase speed to high until stiff peaks form.
  6. Add colour here. Do not over beat
  7. Sift flour mixture over whites and fold in by hand until smooth and shiny. This will take about 50-60 folds. You want the mixture to flow, like magma.
  8. Transfer to piping bag (or ziplock bag with a corner cut off)
  9. Pipe onto a parchment lined (or silpat works too, I prefer the parchment though) pan. about 1" rounds 1" apart. This might take a few to get the hang of it. Pipe about a quarter size and let it spread a little for about an inch in diametre. 
  10. Let stand for 30-45 minutes. You want caps to form. The tops will be dull and have a crust on them. This is a KEY part to the macaron process. 
  11. Preheat oven to 375°, drop to 325° when pan goes in. You might need to prop the oven door open with a wooden spoon or something in order to make sure the oven temp drops.
  12. Bake for 5 minutes. Open the oven, pull the pan out and rotate. Put the pan back in for another  5 minutes. You do not want the tops to brown. You might have to sit in front of your oven and watch them the entire time they bake and change the length of time you bake your macarons until you get the hang of how your oven works.
  13. Remove from the oven and give it a moment to rest. If macaron will not come off the parchment, use a little water on the underside of the paper to release.
** If you live in a humid climate, no matter how closely you follow this recipe, it just might not work. Choose a dry day if at all possible. 

Kinds I've made:
chocolate macarons (sub about 1/4 cups of the icing sugar for cocoa powder) with ganache centres.
mixed coconut flavour and toasted coconut into the ganache for an "Almond Joy" flavour.
Added Baileys to the ganache.

Made Buttercream (the kind with eggs, sugar, cooking and Jedi mind tricks) and added jams to the buttercream (Huckleberry was a fan favourite)

Used homemade lemon curd and dayglo yellow cookies


Just eaten them without filling/icing/centre, I like to think of them as "diet cookies" hahaha...


Thursday, July 5, 2012

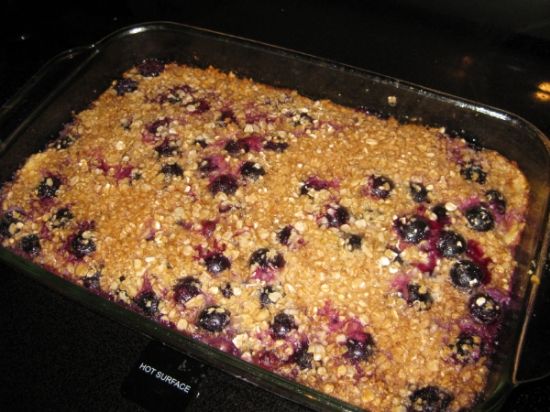
Banana berry oatmeal bake

Or eating crumble for breakfast!
My kids love oatmeal, my kids love fruit and we have had amazing weather and have a bunch of super sweet strawberries just asking to be used in something good.

 photo 416be795-237c-4f87-96e7-101d27d05dce.jpg


Ingredients
  • 1 cup old-fashioned rolled oats
  • 1/2 tsp. baking powder
  • 1 tsp. ground cinnamon
  • Pinch of salt
  • 1 cup milk 
  • 1 large egg, lightly beaten
  • 2 tbsp. unsalted butter, melted and cooled slightly
  • 1 tsp. vanilla extract
  • 2 to 3 ripe bananas, peeled and sliced
  • 1 1/2 cups blueberries or raspberries, fresh or frozen, divided
**Can add 1/4 cup chopped walnuts if desired **

 photo bc11dd2d-fcb5-478e-beb6-3f1dba86ef73.jpg


Directions:

    1. Preheat the oven to 375F.
    2. Lightly grease a 2-quart baking dish. In a medium bowl, mix the oats, half of the walnuts, baking powder, cinnamon, and salt. Stir to combine. In a liquid measuring cup, combine the syrup, milk, egg, butter, and vanilla.
    3. Spread the sliced bananas in a single layer over the bottom of the baking dish. Top with half of the berries. Sprinkle the dry oat mixture over the fruit in an even layer. Pour the liquid ingredients evenly over the oats.
    4. Sprinkle the remaining nuts and berries over the top. Bake for 35-40 minutes, until the top is browned and the oats have set. Let cool 10 minutes before serving.

Wednesday, March 14, 2012

The pierogi infatuation

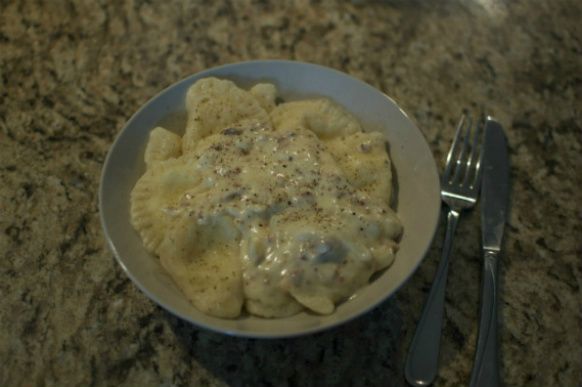
So we all piled in the car a few weeks ago to go for a drive. It wasn't that nice outside, but the kids were getting over colds and we had all been stuck in the house and just wanted out. We ended up in a small town about 45 minutes away, that has a fantastic little mennonite restaurant. The make the best peanut butter chocolate pie ever. Ever. But we hadn't eaten lunch yet and although had the kidlets not been in the car I'm sure I would have just had pie for lunch, I needed to set a somewhat good example. So we had the pierogies. Not just pierogies, but probably the best pierogies ever. Ever.

Photobucket

We got home and a few days later both T and I were contemplating driving back to the restaurant for another helping of doughy goodness. I set out to find a recipe that would keep us from driving 45 minutes every couple of days.
After tweaking and fine tuning we came up with this little gem. Oh there is no doubt we will be making the trek again for pierogies and pie, but at least we have these that come pretty darned close.

Dough:
One 8 ounce tub of sour cream
3 cups all purpose flour
3 eggs
1/4 tsp salt
1 tbsp baking powder

Filling:
2 cups dry curd cottage cheese (you can get this at Safeway)
1 egg yolk
1 tsp salt
pepper to taste

White Gravy
1/4 cup melted butter
1 cup sour cream
1/4 cup thinly sliced onion
2 tbsp bacon bits


Dough:
Mix together sour cream and eggs until smooth. Mix together dry ingredients and then into the sour cream/egg mixture. Add more flour as need to form a slightly sticky dough. Roll out on roulepat or very lightly floured surface. You want it to stick slightly to the board to make it a little easier to get the dough nice and thin. Cut out with a drinking glass.

Mix together all ingredients for the filling and spoon a portion into the cut out dough circles.
Press together the edges to seal in the filling. I found that I would press together the edges with my fingers and then use a fork to make sure I had it sealed well.

To cook just drop them into salted boiling water for 5 minutes or so, or until dough is soft.

To make the gravy.
Add the sour cream to the melted butter in a sauce pan and whisk until smooth. Add sliced onion and bacon and allow to simmer for about 5 to 7 minutes.


Boil as many as you want and add the gravy on top. You don't need much gravy, it is rich, but man alive it is GOOD!

**Pierogies can be made, frozen and dropped into boiling water and cooked for about 10-12 minutes, which makes this a perfect recipe to do in advance**

Thursday, January 19, 2012

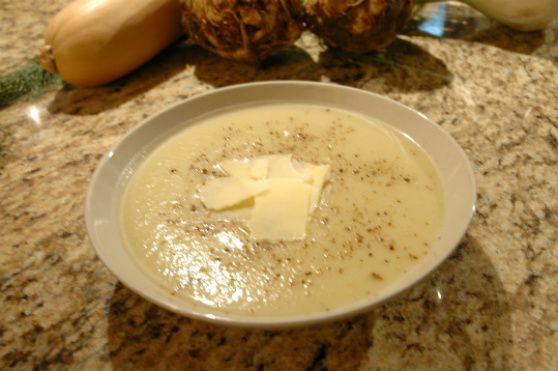
Celeriac Soup

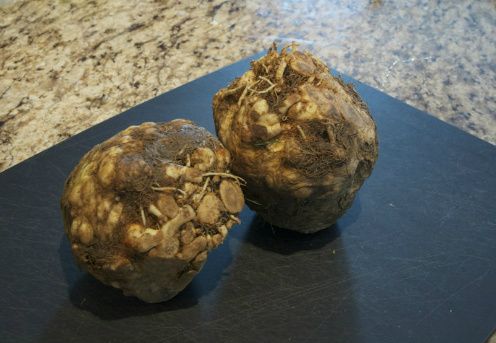
Who knew such goodness could come from such an ugly little root?
Photobucket

Celeriac, or Celery Root. I hate celery, but love this soup.
It is the perfect cold winters day food. Curl up all day in front of the fire with a good book while this sits on the stove waiting for you.


Ingredients:

1 tbsp butter
4 small or 3 medium celeriac roots
4 leeks
1 small potato (red, white or yellow)
4 cups of stock (I prefer homemade if possible, but the organic low sodium one from Campbells is pretty decent)
Pepper to taste

5 year old Balderson Cheddar, shredded.


Hack the celeriac apart. Okay, no it looks like it needs to be hacked at, but just slice off the outer shell and get all the nubby bit off. There will likely be dirt all over the place, just rinse the celeriac off and chop into 1cm cubes. Cut the leaks into into thin slices.
Melt butter in a pot and add leeks in, sauté them until they're soft. Add in the celeriac and cook slowly.
Peel and cube potato and add to leek/celeriac mix
Add salt and pepper (I add a lot of pepper)
Add the stock.
Turn down the temp to allow a simmer until potato and celeriac are soft.
Can add more salt & pepper to taste. I usually add a little more pepper to mine.
Put into blender (in batches if need be) and blend on high until smooth.
Rinse out pot you used to cook in and return blended portions to it and mix together.

Just before you serve, add a small handful of the super sharp cheese and let it melt a little into the soup.

Oh so tasty.

Photobucket